Automatic Setup

Click on File, then in the Account Information window that opens, select the ‘Add Account’ button
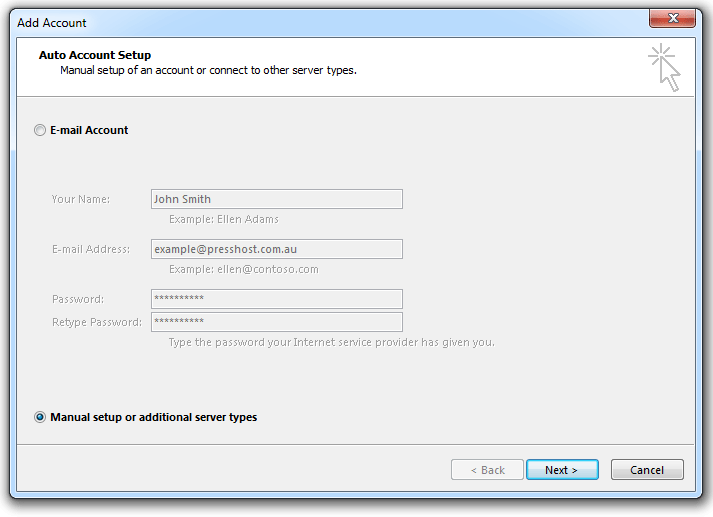
Add in your name and your account details and click Next
Manual Setup
If automatic setup fails you can manually add your new email address.
Click on File and ‘Add account‘ as per the Automatic Setup
In the Add Account dialogue window, click on the Manual Setup or additional server types radio button (see image below)
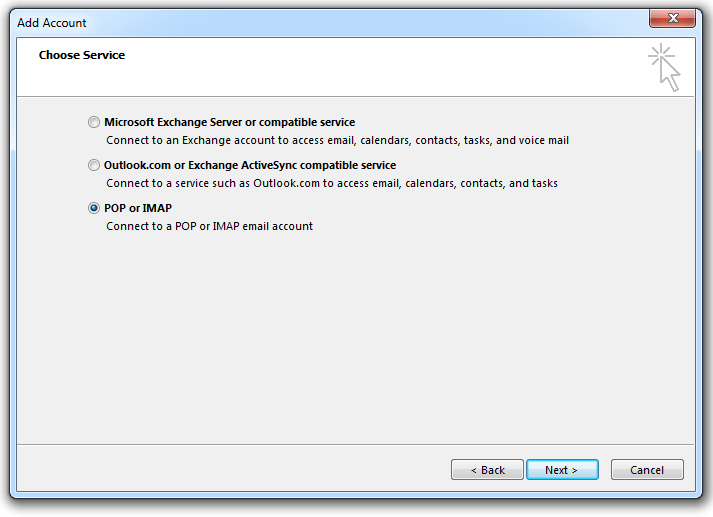
Click the POP or IMAP option
- Fill in the User Information (Name and Email Address)
- Select IMAP as the Account Type
- use mail.yourdomain.com as your Incoming and Outgoing Server (i.e. mail.presshost.com.au)
- The Logon Information is your FULL email address and password
- Click on the ‘More Settings…‘ button in the bottom right corner

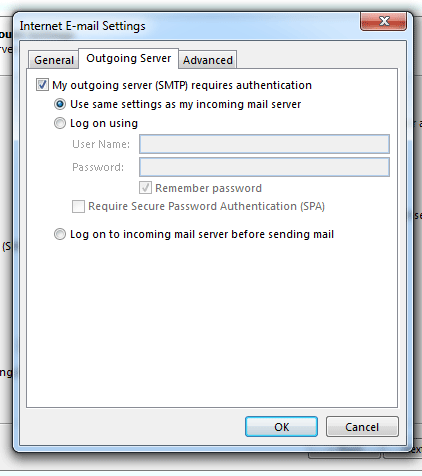
- In the Outgoing Server tab, make sure ‘My outgoing server (SMTP) requires authentication is tickedBy default, Use same settings as my incoming mail server should already be set
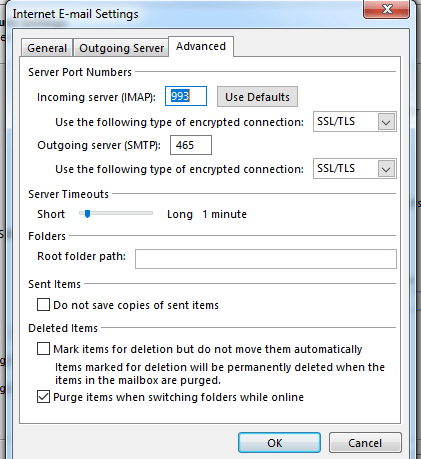
- In the Advanced tab, set the ports and encryption to the following –
- Incoming IMAP port 993 using SSL/TLS encryption
- Outgoing SMTP port 465 (or port 26) using SSL/TLS encryption
- Click OK to return to the email and password settings window
- Click the Test Account Settings button and you should see all items with green check marks.
- Click the Close Button to close the test window.
- Click OK to save your settings.